Unleash the audiophile within you and set to unravel the captivating world of car radio wiring! In this illuminating article, we delve deep into the mesmerizing realm of color codes that govern your beloved Mercedes radio system. From decoding the language of wires to understanding their electric harmony, we will equip you with the knowledge to conquer any radio installation or troubleshooting endeavor. So, fasten your seatbelts, turn up the imagination, and join us on this transformative journey through the kaleidoscope of Mercedes radio wiring color codes.
Understanding Mercedes Radio Wiring Color Codes: A Comprehensive Guide
In the complex world of car audio systems, deciphering the intricate wiring color codes can feel like trying to crack a secret code. Fear not, fellow Mercedes enthusiasts! This comprehensive guide is here to shed some light on the mysterious world of Mercedes radio wiring color codes.
The Basics
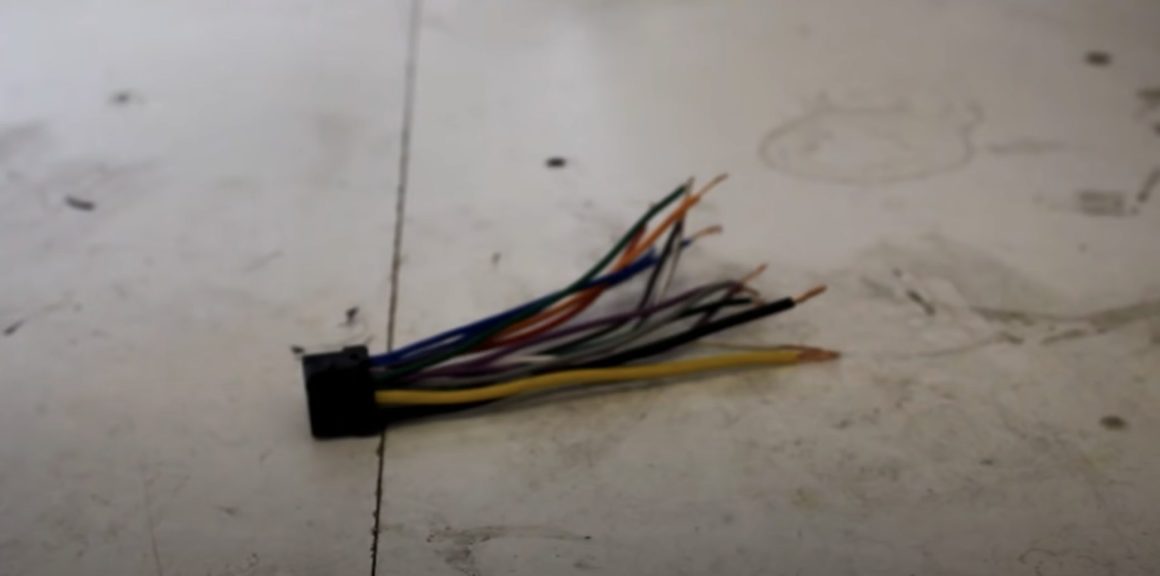
- Black: Ground wire. Connect this wire to the metal frame of your vehicle to establish a proper ground connection.
- Red: Power wire. Connect this wire to the positive terminal of your car battery or a proper power source to supply electricity to your radio.
- Yellow: Constant power wire. Connect this wire to a power source that provides constant power, even when the ignition is turned off. This ensures that your radio settings and presets are saved.
- Orange: Illumination wire. Connect this wire to the vehicle’s light switch to illuminate the radio display when the headlights are turned on.
Speaker Connections
Now, let’s dive into the world of speaker connections. Each Mercedes model may have its own unique wiring color codes for the speakers, so be sure to consult your specific vehicle’s manual or wiring diagram. However, here are some common color codes you might come across:
- White: Front left speaker positive wire
- White with black stripe: Front left speaker negative wire
- Gray: Front right speaker positive wire
- Gray with black stripe: Front right speaker negative wire
- Green: Rear left speaker positive wire
- Green with black stripe: Rear left speaker negative wire
- Purple: Rear right speaker positive wire
- Purple with black stripe: Rear right speaker negative wire
Other Connections
Besides power and speaker connections, there are a few more wires you may encounter. Here are some common ones:
- Blue: Remote wire. Connect this wire to your Mercedes’ amplifier or power antenna to turn them on/off along with the radio.
- Brown: Mute wire. Connect this wire to a separate device or system that can mute the radio audio when activated, such as a phone or navigation system.
- Various colors: Steering wheel control wires. These wires enable you to control your radio system using buttons on your steering wheel. Refer to your vehicle’s manual for specific color codes.
Remember, always double-check your vehicle’s manual or wiring diagram to ensure accurate information for your specific model. With this comprehensive guide, understanding Mercedes radio wiring color codes will no longer be a daunting task. Happy wiring and enjoy the ultimate audio experience in your Mercedes!
Demystifying Color Coding: Decoding the Wiring System of Mercedes Radios
Understanding the Wiring System of Mercedes Radios
When it comes to the complex world of Mercedes radios, understanding the wiring system can sometimes feel like deciphering an intricate puzzle. However, fear not! We are here to demystify the color coding and help you decode the secrets behind your beloved vehicle’s audio system.
So, let’s dive right in and unravel the mysteries:
- Red Wire: Typically represents a constant power source. It ensures that your radio retains its memory, even when the engine is turned off.
- Yellow Wire: Connects to the ignition switch. When the ignition is turned on, this wire supplies power to the radio, allowing it to turn on and function.
- Black Wire: Serves as a ground wire, providing a path for electrical current to return to the vehicle’s battery. It ensures proper functioning of the radio and prevents electrical issues.
- Blue Wire: Often used for connecting an amplifier or an external hands-free device. It enables enhanced audio experiences and compatibility with additional audio accessories.
- Green Wire: Linked to the radio’s display illumination and dimmer switch. This wire controls the brightness of the radio’s display, making it easier to read and reducing eyestrain.
- White and Gray Wires: These wires are typically associated with front and rear speakers, respectively. Connecting these wires to the corresponding speakers allows you to enjoy your favorite tunes throughout your Mercedes.
Now that we have unveiled the secrets behind the color coding, you are armed with the knowledge to navigate the wiring system of your Mercedes radio with confidence. Say goodbye to confusion and embrace the joy of an optimized audio experience!
Insider Tips: Maximizing Efficiency in Mercedes Radio Wiring Installation
Efficiently installing a new radio in your Mercedes can enhance your driving experience and add a touch of personalization to your vehicle. To ensure a flawless wiring installation process, we’ve compiled a list of insider tips that will help you maximize efficiency:
- Plan and organize: Before beginning the installation, create a checklist of all the tools and materials you’ll need. This will save you time and prevent any unnecessary trips to the store.
- Read the manual: Familiarize yourself with the radio’s manual and wiring diagrams. Understanding the instructions beforehand will enable you to work faster and with greater accuracy.
- Create a wire harness: Constructing a wire harness before installation helps eliminate confusion and reduces the risk of making incorrect connections. Label each wire accordingly for easy identification later on.
- Remove negative battery terminal: For safety reasons, disconnect the negative battery terminal before working on any electrical components. This step prevents potential electric shocks or short circuits.
- Secure your workspace: Clear the area around your car’s dashboard and ensure you have a well-lit, clutter-free workspace. This will enable you to work more efficiently and reduce the chances of misplacing important tools or parts.
- Use quality connectors: Invest in high-quality connectors to ensure secure and stable connections. These will minimize the risk of loose connections or electrical malfunctions in the long run.
- Test your connections: Before reassembling the dashboard, test all the connections to confirm that the radio is functioning properly. This will save you time by addressing any potential issues before completing the installation.
- Secure and tidy wiring: Once you’re satisfied with the connections, neatly secure and organize the wiring behind the dash. Properly bundled wires prevent tangling, improve airflow, and make future maintenance easier.
Following these insider tips will help you maximize efficiency and save time during your Mercedes radio wiring installation. Enjoy your new radio and the enhanced driving experience it brings!
The Perfect Match: Choosing the Right Wiring Color Codes for Your Mercedes Radio
Mercedes-Benz vehicles are known for their luxurious features, and the radio system is no exception. When it comes to installing a new radio in your Mercedes, it is crucial to choose the right wiring color codes to ensure a seamless and functional connection. Here are some tips to help you navigate through the world of wiring color codes for your Mercedes radio:
1. Understand the Wiring Color Codes:
Each wire in your Mercedes radio’s harness is assigned a specific color code. Familiarize yourself with these codes to easily identify which wire does what. Here are the typical color codes you may encounter:
– Red: Power supply.
– Yellow: Constant power supply.
– Black: Ground connection.
– Blue: Antenna control.
– White: Front left speaker (+).
– White/Black: Front left speaker (-).
– Gray: Front right speaker (+).
– Gray/Black: Front right speaker (-).
– Green: Rear left speaker (+).
– Green/Black: Rear left speaker (-).
– Purple: Rear right speaker (+).
– Purple/Black: Rear right speaker (-).
2. Cross-Check with the Manual:
To ensure accuracy, always refer to the manual provided by the manufacturer of your Mercedes radio. The manual should have a detailed diagram depicting the wiring color codes specific to your model. This will help you avoid any confusion when connecting the wires.
3. Use Wiring Harness Adapters:
To make the installation process easier and safer, consider using wiring harness adapters. These adapters connect your Mercedes radio’s wiring to the existing electrical system in your vehicle. They often come labeled with color codes, which simplify the connection process and reduce the risk of making mistakes.
4. Verify the Connections:
Once you have connected the wires according to the appropriate color codes, it is crucial to double-check and verify all the connections before finalizing the installation. This will ensure that all the functions of your Mercedes radio work correctly, such as sound output, radio reception, and any additional features.
Choosing the right wiring color codes for your Mercedes radio is essential for a successful installation. By understanding the color codes, referring to the manual, using wiring harness adapters, and verifying connections, you can confidently enjoy your new radio system in your luxurious Mercedes-Benz vehicle.
Q&A Diagram Mercedes Radio Wiring Color Codes
Diagram Mercedes Radio Wiring Color Codes - A Comprehensive Guide
Are you in need of information about Mercedes radio wiring color codes? If so, you’ve come to the right place. In this article, we’ll provide you with a comprehensive guide to understanding and decoding the wiring color codes used in Mercedes radios. Whether you’re an automobile enthusiast or a professional installer, this article will help you navigate through the complexities of Mercedes radio wiring.
So let’s dive into the frequently asked questions about Mercedes radio wiring color codes:
1. What are radio wiring color codes?
Radio wiring color codes are standardized colors assigned to specific wires that connect various components in a car’s audio system. These codes play a crucial role in identifying and connecting the correct wires during radio installation or troubleshooting.
2. Why do we need to understand Mercedes radio wiring color codes?
Understanding Mercedes radio wiring color codes is essential for anyone working with Mercedes vehicles, including owners, DIY enthusiasts, and professional installers. It ensures accurate installation, proper troubleshooting, and minimizes the potential for damaging components due to incorrect connections.
3. Are Mercedes radio wiring color codes universal?
No, Mercedes radio wiring color codes are not universal. Each automaker may use different color codes to identify wires. Therefore, it’s crucial to consult the specific wiring diagram or reference guide for Mercedes vehicles to accurately identify the wire functions based on their colors.
4. Where can I find the wiring diagram or reference guide for Mercedes radio wiring color codes?
The wiring diagram or reference guide for Mercedes radio wiring color codes can typically be found in the vehicle’s owner’s manual or service manual. Additionally, there are several online resources and aftermarket publications that provide detailed diagrams and color codes for various Mercedes models.
5. How can I decode Mercedes radio wiring color codes?
Decoding Mercedes radio wiring color codes requires referencing a wiring diagram or reference guide specific to your vehicle’s make, model, and year. Once you have the correct diagram or guide, you can match the wire colors to their corresponding functions, such as power, ground, speaker outputs, and auxiliary connections.
6. Can I use aftermarket wiring harnesses to simplify Mercedes radio installations?
Yes, using aftermarket wiring harnesses can greatly simplify Mercedes radio installations. These harnesses are designed to match the Mercedes radio wiring color codes and plug directly into the factory harness without the need for cutting or splicing wires. This makes the installation process much easier and allows for seamless removal or replacement of the radio in the future.
7. Is it necessary to consult a professional for Mercedes radio wiring installation?
While it’s possible to install a Mercedes radio yourself, especially with the help of wiring diagrams and reference guides, consulting a professional installer can ensure a flawless installation and avoid any costly mistakes. If you’re unsure about your abilities or lack experience in car audio installations, it’s always best to seek professional assistance.
Now that you have a better understanding of Mercedes radio wiring color codes, you can confidently tackle any radio installation or troubleshooting project in your Mercedes vehicle. Remember to consult the appropriate wiring diagrams or reference guides and exercise caution to ensure a successful and safe installation process.
In Retrospect
In conclusion, exploring the realm of Mercedes radio wiring color codes can feel like journeying through a labyrinth of wires and connections. But fret not, for armed with a diagram, decoding the enigmatic hues becomes a gratifying quest, unlocking the audio treasures that await within your prized Mercedes-Benz.
Remember, these color codes are not mere random brushstrokes on the canvas of your vehicle’s audio system. They are carefully curated and standardized to ensure a seamless symphony between your music and the soul of your Mercedes. Whether you’re a DIY enthusiast or a professional installer, familiarizing yourself with these color codes opens up a world of possibilities and unleashes your inner maestro.
So go forth, armed with this newfound knowledge, and embark on your own harmonious adventure. Feel the exhilaration as you gracefully tap into the melody of your choice, at the precise moment you ignite your engine. Let the vibrations of sound resonate through every fiber of your being, as you cruise along, your Mercedes transformed into a sanctuary of sonic bliss.
Remember, in the world of Mercedes radio wiring color codes, each hue has a purpose and a place. So listen intently, decode meticulously, and bask in the symphony of sound that envelopes you. Your Mercedes awaits, ready to dance to the rhythm of your heart.

A Boston University Electrical Engineering graduate.
Electronics designer for EV giants like Tesla, BMW, VW, and Ford.
Enthusiastic Wikipedia moderator in the automotive category and author of automotive articles.
Passionate about tech, travel, and cars.

