The mesmerizing dance between raindrops and windshields unveils a hidden hero responsible for maintaining our clear view of the world outside. Have you ever paused to ponder the intricate orchestration behind the rhythmic swipes of your car’s windshield wipers? Fret not, for we have delved into the enigmatic world of windshield wiper motors to decipher the inner workings of these unsung champions. Today, our focus narrows down to the captivating complexities of the 5 wire wiper motor wiring diagram, unraveling its secrets strand by strand. So buckle up, dear reader, as we embark on a journey of discovery into the captivating realm of wires, connections, and the artistry behind human innovation.
Understanding the Basic Components of a Windshield Wiper 5 Wire Wiper Motor Wiring Diagram
A windshield wiper 5 wire motor wiring diagram may seem like a complex puzzle at first, but once you understand its basic components, you’ll be able to navigate through the intricacies with ease. Let’s delve into the various elements that make up this fascinating diagram:
- Motor: At the heart of the wiper motor wiring diagram lies the motor itself. This powerhouse is responsible for powering the wiper blades and providing the necessary force to clear your windshield.
- Wiper blades: Without these trusty companions, your wiper motor would be rendered useless. The wiper blades are the physical components that actually come into contact with your windshield, efficiently swiping away rain, snow, or debris.
- Control switch: Acting as the commander-in-chief of your windshield wiper system, the control switch allows you to activate and control the movement of your wiper blades. With a simple flick of the switch, you can adjust their speed or turn them on and off as desired.
These are just a few of the fundamental components that form the backbone of a 5 wire wiper motor wiring diagram. By understanding how these pieces fit together, you’ll gain a clearer picture of the intricate workings behind this essential automotive feature. So, the next time you find yourself puzzled by your windshield wiper system, remember to consult your trusty diagram and let these components lead the way to clear, unobstructed view.
Analyzing the Wiring Diagram: Key Connections and Functions of Each Wire
When delving into the intricacies of a wiring diagram, it’s crucial to understand the key connections and functions of each wire. The diagram acts as a blueprint that unlocks the hidden marvels behind any electrical system. So, let’s embark on an enlightening journey where we unravel the web of wires and unravel their hidden potential.
One of the most essential connections found in a wiring diagram is the ground wire. Symbolized by a series of short, parallel lines, this wire provides a pathway for electric currents to return to the source, completing the circuit. Without proper grounding, electrical systems can pose hazardous risks. Another crucial connection is the live wire, represented by a solid line. It carries the alternating current (AC) or direct current (DC) from a power source to the intended destination. These wires are often color-coded, with black indicating the live wire in an AC circuit and red for a DC circuit. However, it’s important to consult the specific wiring diagram for accurate color distinctions. Apart from these key connections, other wires contribute to specialized functions, such as neutral wires that provide a return path for AC current, and control wires that enable regulation and communication within a system.
Step-by-Step Guide: Installing and Troubleshooting Your Windshield Wiper 5 Wire Wiper Motor
Once you have acquired your new 5-wire windshield wiper motor, follow these steps to install and troubleshoot it effortlessly:
First, gather the necessary tools for a smooth installation process. You will need a flathead screwdriver, pliers, wire cutters, and electrical tape. Make sure to have these by your side before you begin.
Step 1: Disconnect the negative terminal of the car battery to avoid any electrical accidents during the installation. Safety first!
Step 2: Locate the motor assembly on your vehicle. Typically, it can be found at the base of the windshield under the hood. Using the flathead screwdriver, remove any screws or clips securing the assembly in place. Take your time and work carefully to avoid damaging any surrounding components.
Step 3: Once the motor assembly is loose, disconnect the electrical connector attached to it. Check for any signs of corrosion or damage on the wires. In case you spot any, use the wire cutters to remove the affected section and strip the wire ends for a clean connection later.
Step 4: Remove the old wiper motor carefully from the assembly using the pliers. Be gentle to prevent any breakage or additional damage.
Now that you have successfully installed your new windshield wiper motor, it’s time to troubleshoot any potential issues. If your wipers are not functioning correctly, follow these steps to rectify the problem:
Step 1: Double-check the electrical connections. Make sure they are securely attached and there are no loose or frayed wires. Safeguard your connections with electrical tape if necessary.
Step 2: Test your wiper motor by turning on your vehicle’s wiper switch. If the motor hums but the wipers do not move, the issue might be with the wiper linkage. In this case, inspect the linkage for any damage or obstructions and clean or replace it as needed.
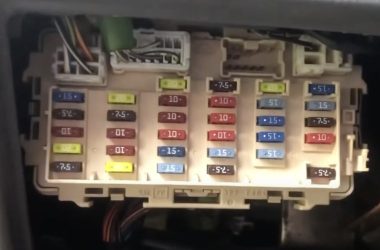
Step 3: If the wiper motor remains non-responsive, verify the fuse dedicated to the wiper system. Use your vehicle’s manual to locate the fuse box and find the appropriate wiper fuse. Replace it if blown or damaged.
By following these step-by-step instructions, you can safely install and troubleshoot your windshield wiper 5-wire motor, ensuring optimal performance even during challenging weather conditions. Happy driving!
Expert Tips for Maintaining and Extending the Lifespan of Your 5 Wire Wiper Motor
Proper care and maintenance of your 5 wire wiper motor is crucial for ensuring its longevity and efficient operation. To help you make the most out of this essential automotive component, we’ve gathered some expert tips that will keep your wiper motor running smoothly for years to come.
1. Regular cleaning: Dirt and debris can accumulate on your wiper motor, affecting its performance. Gently clean the motor housing and blades using a soft cloth or brush to remove any dirt or grime buildup. This will help prevent strain on the motor and avoid unnecessary wear and tear.
2. Lubrication: Proper lubrication is essential for the smooth functioning of your wiper motor. Check the manufacturer’s instructions for the recommended lubricant and apply it to the designated areas. This will reduce friction and ensure the motor operates quietly and efficiently.
3. Inspect the wiring: Regularly inspect the wiring connections of your 5 wire wiper motor. Look for any signs of damage or loose connections. If you notice any issues, promptly repair or replace the damaged wiring to prevent electrical malfunctions.
4. Check the wiper arms and blades: Inspect the wiper arms and blades for any signs of damage, such as cracks or tears. Damaged components can put additional strain on the motor, leading to premature wear. Replace any worn-out wiper arms or blades to ensure optimal performance.
5. Protect from harsh weather: Extreme weather conditions, such as heavy rain, snow, or direct sunlight, can impact the lifespan of your wiper motor. Consider using a windshield cover during intense sunlight or parking your vehicle in a covered area during inclement weather to minimize exposure and protect the motor from unnecessary stress.
By following these expert tips, you can maintain and extend the lifespan of your 5 wire wiper motor, ensuring clear visibility and safe driving in all weather conditions. Remember, regular maintenance is key to keeping your wiper motor in top-notch condition and avoiding costly replacements.
Q&A
Q: What is a windshield wiper 5 wire wiper motor wiring diagram?
A: A windshield wiper 5 wire wiper motor wiring diagram is a visual representation that illustrates the electrical connections and functions of the various wires within a 5 wire wiper motor system.
Q: Why is a wiring diagram necessary for a windshield wiper motor?
A: A wiring diagram is necessary for a windshield wiper motor to ensure proper installation and troubleshooting. It helps technicians understand the electrical pathways and connections, enabling them to identify and address any wiring issues that may arise.
Q: What does a typical 5 wire wiper motor wiring diagram include?
A: A typical 5 wire wiper motor wiring diagram includes information such as wire color codes, connection points, and the electrical flow between the wiper motor, switches, and other components. It may also provide additional details about features such as intermittent settings, park positions, and variable speed options.
Q: How can a 5 wire wiper motor wiring diagram be useful?
A: A 5 wire wiper motor wiring diagram is useful for several reasons. It serves as a guide for technicians during installation, ensuring wires are properly connected. It also helps diagnose and troubleshoot any issues that may arise with the wiper motor system. Additionally, the diagram can be used as a reference for future maintenance and repairs.
Q: Are all 5 wire wiper motor wiring diagrams the same?
A: While the basic principles remain similar, 5 wire wiper motor wiring diagrams can vary between different vehicle models and manufacturers. It is important to consult the specific wiring diagram relevant to your vehicle to ensure accuracy and avoid any potential confusion.
Q: Can I find a windshield wiper 5 wire wiper motor wiring diagram online?
A: Yes, many automotive websites, forums, and service manuals provide access to windshield wiper 5 wire wiper motor wiring diagrams. These diagrams can be downloaded or viewed online, providing a convenient resource for troubleshooting and installation purposes.
Q: Can I attempt to wire a 5 wire wiper motor without a diagram?
A: While it is technically possible to wire a 5 wire wiper motor without a diagram, it is strongly advised against. Without a diagram, the risk of incorrectly connecting the wires increases, potentially causing electrical malfunctions or damage to the wiper motor system. Therefore, it is recommended to use a diagram for accuracy and safety purposes.
Q: Are there any precautions I should take when working with a 5 wire wiper motor wiring diagram?
A: When working with a 5 wire wiper motor wiring diagram, ensure that the vehicle’s power source is disconnected. It is also important to follow recommended safety procedures, such as wearing protective gloves and using insulated tools, to prevent any electrical accidents or injuries. If unsure, it is advisable to seek professional assistance.
Closing Remarks
And there you have it – a comprehensive guide to understanding the intricate world of windshield wiper 5 wire wiper motor wiring. We’ve unraveled the mysteries, provided a detailed diagram, and walked you through the step-by-step process of making those crucial connections.
Whether you’re a novice DIY enthusiast or a seasoned mechanic, this article should have given you the confidence to tackle any wiring challenge that comes your way. Gone are the days of staring cluelessly at a mass of tangled wires, unsure of where each one should go.
With this newfound knowledge, you’ll be able to effortlessly navigate the realms of windshield wiper wiring. No longer will you be left at the mercy of unpredictable weather patterns, or worse, a faulty wiper motor.
So, next time you’re faced with a malfunctioning wiper motor, remember what you’ve learned here. Armed with your trusty diagram, you’ll be able to restore clarity to your windshield and get back on the road with peace of mind.
And with that, it’s time to bid farewell. May your wipers always operate smoothly, your vision remain clear, and your journeys be filled with adventures, both big and small.
Until next time, happy wiring!

A Boston University Electrical Engineering graduate.
Electronics designer for EV giants like Tesla, BMW, VW, and Ford.
Enthusiastic Wikipedia moderator in the automotive category and author of automotive articles.
Passionate about tech, travel, and cars.